Configuration
Understanding the Architecture
Section titled “Understanding the Architecture”Commerce Connect creates a powerful integration between WordPress® and BigCommerce:
- BigCommerce: Your source of truth for products, inventory, pricing, and checkout
- Commerce Connect: Syncs product data to WordPress® for display and SEO
- WordPress®: Handles content, pages, SEO, and marketing using synced product data
Connecting to BigCommerce
Section titled “Connecting to BigCommerce”Creating Your BigCommerce Account
Section titled “Creating Your BigCommerce Account”Commerce Connect guides you through creating a BigCommerce trial account directly from WordPress®:
- In WordPress® admin, navigate to Commerce Connect → Connect
- Click Continue
- New window opens with BigCommerce signup form
- Fill out the form:
- First Name
- Last Name
- Email Address
- Store Name (your business name)
- Password
- Click Create Store
- Copy the authorization code displayed
- In the BigCommerce authorization window, paste the code
- Click Authorize

Result: Your BigCommerce store is created and automatically connected to Commerce Connect.
The Connect tab will now display:
- Store Name
- Connected status
You can log into BigCommerce admin using the credentials you just created.
Products Settings
Section titled “Products Settings”Configure how products display on your site from Commerce Connect > Settings > Products.

Display Options
Section titled “Display Options”| Setting | Description | Default |
|---|---|---|
| Products per page | Number of products to show per page | 10 |
| Products per row (Desktop) | Grid columns on desktop devices | 3 |
| Products per row (Mobile) | Grid columns on mobile devices | 1 |
| Products open in | Where product links open (same tab/new window) | Current tab/window |
Currency Display
Section titled “Currency Display”Choose how product prices display:
- Symbol (e.g., $ or €) - Show currency symbol only
- Code (USD, GBP) - Show ISO currency code
- Name/Symbol (“$100” rather than “US$100”) - Use short form
- Name (“dollar”) - Full currency name
Product Ordering
Section titled “Product Ordering”Set the default order for product listings:
- Newest to oldest - Sort by creation date (newest first)
- Oldest to newest - Sort by creation date (oldest first)
- Price: Low to high - Lowest price first
- Price: High to low - Highest price first
These settings apply globally to product blocks unless overridden at the block level.
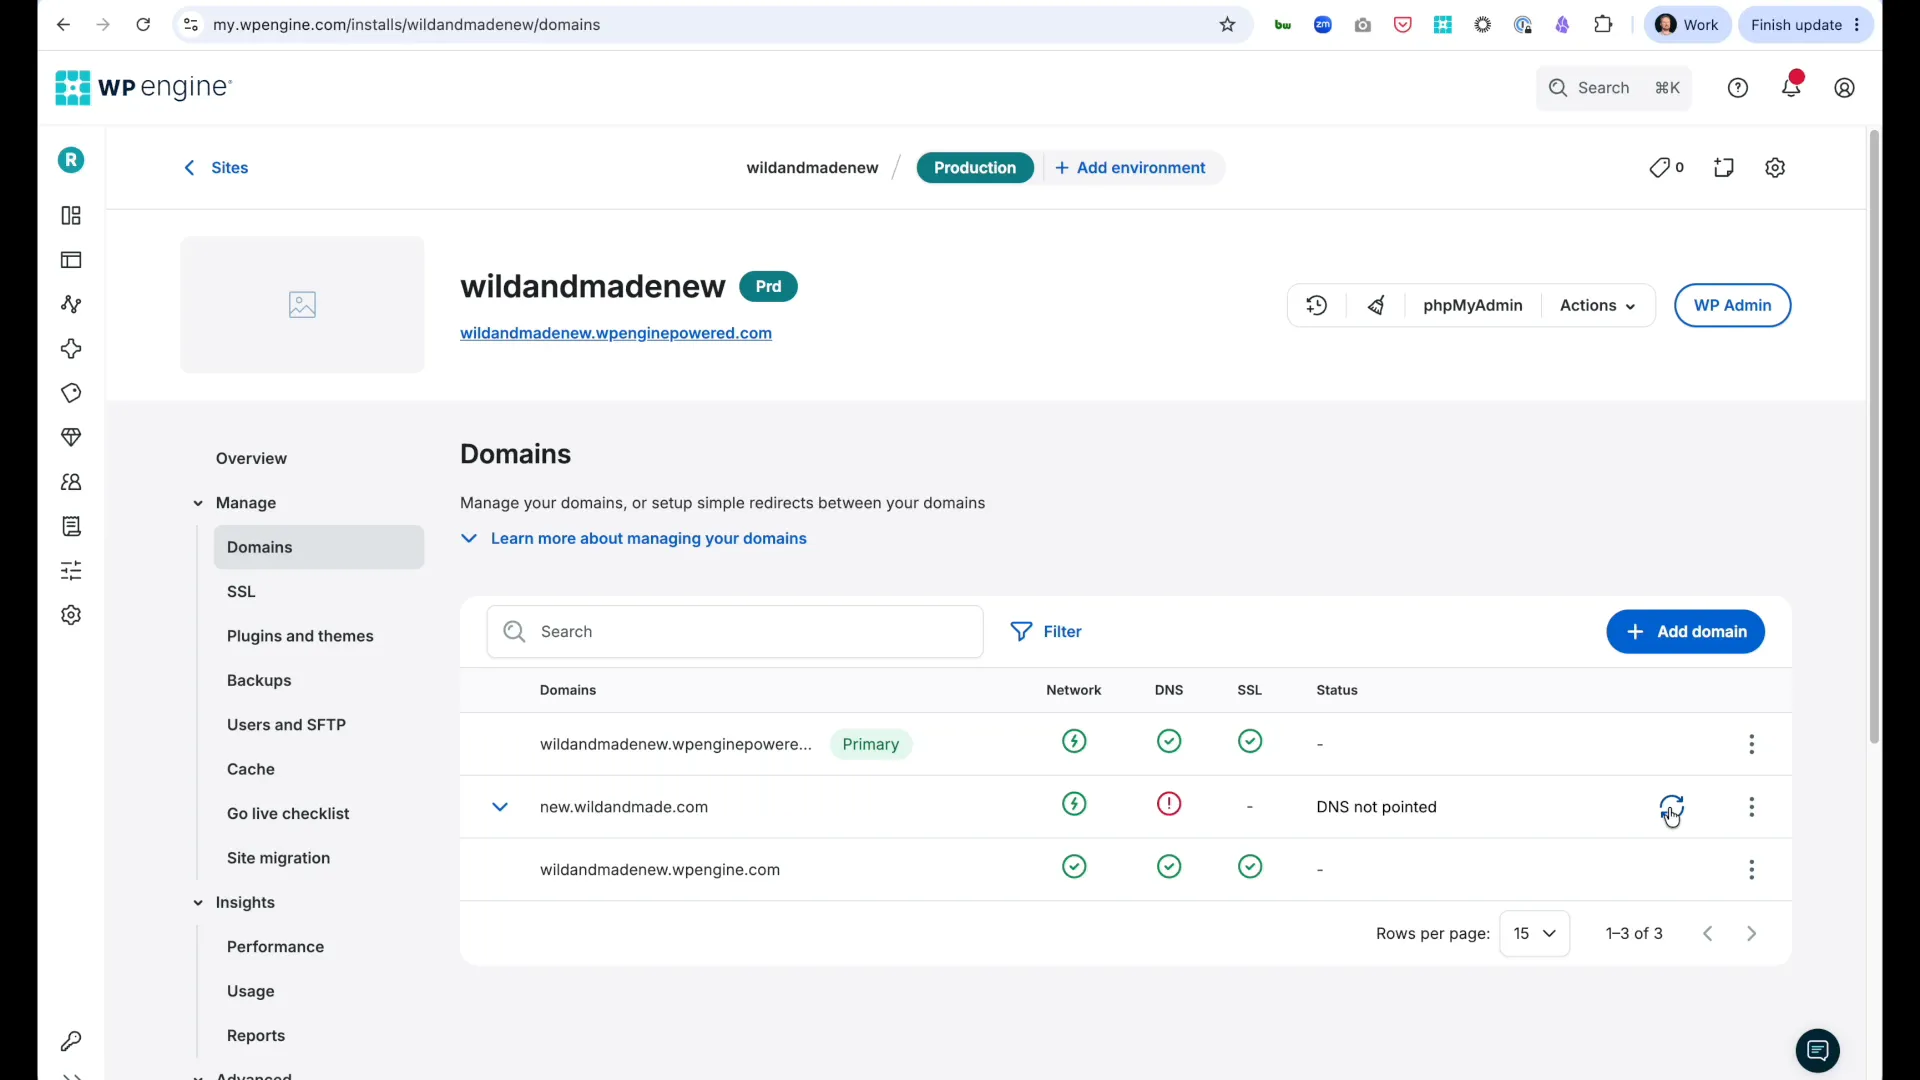
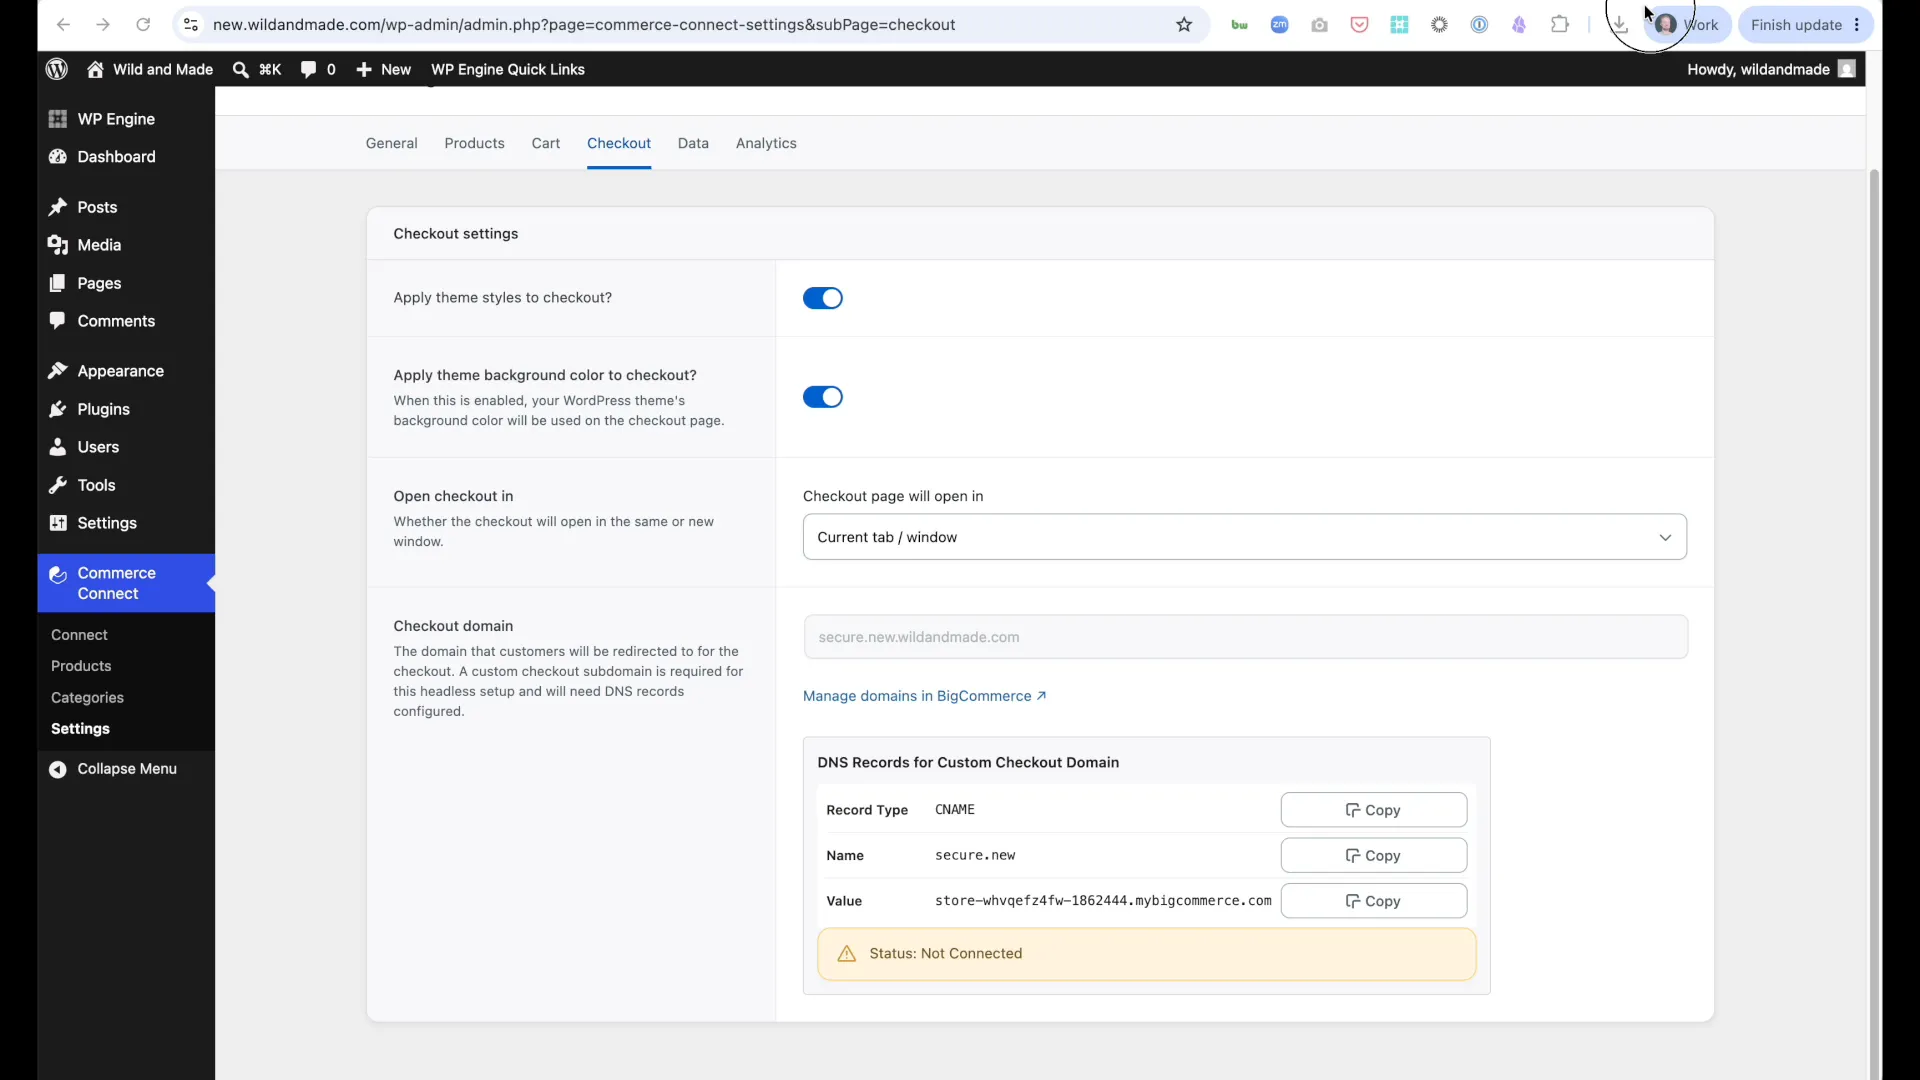
Checkout Domain Configuration
Section titled “Checkout Domain Configuration”Default Checkout Domain
Section titled “Default Checkout Domain”When you connect to BigCommerce, a checkout domain is automatically configured:
Default pattern: checkout.yourdomain.com
Setting a Custom Checkout Domain (Recommended)
Section titled “Setting a Custom Checkout Domain (Recommended)”For better branding and security, configure a custom checkout subdomain:
- Navigate to Commerce Connect → Settings
- Note the current checkout domain
- Click Manage Domains (opens BigCommerce admin)
- In BigCommerce:
- Disconnect the current checkout domain
- Click Connect Custom Domain
- Enter your custom subdomain (e.g.,
secure.yourdomain.com) - Click Next
- Select Add SSL Later
- Complete the setup
Configure DNS for Custom Checkout
Section titled “Configure DNS for Custom Checkout”After setting the custom domain in BigCommerce, update your DNS:
- Log into your DNS provider (Cloudflare, GoDaddy, etc.)
- Add a CNAME record:
- Type: CNAME
- Name: Subdomain only (e.g.,
secureif usingsecure.yourdomain.com) - Value: BigCommerce URL provided (format:
[hash].mybigcommerce.com) - Proxy Status: Set to DNS Only (important for Cloudflare users - do not proxy)
- Save the record
Verify DNS Propagation
Section titled “Verify DNS Propagation”- Use dnschecker.org to verify propagation
- Search for your full checkout domain (e.g.,
secure.yourdomain.com) - Select CNAME record type
- Verify propagation across multiple locations
Confirm Connection in Commerce Connect
Section titled “Confirm Connection in Commerce Connect”- Return to Commerce Connect → Settings
- Refresh the page
- Checkout Domain should now show your custom domain
- Status should display “Connected”
If status shows “Not Connected”: DNS has not propagated yet. Wait a few minutes and refresh.
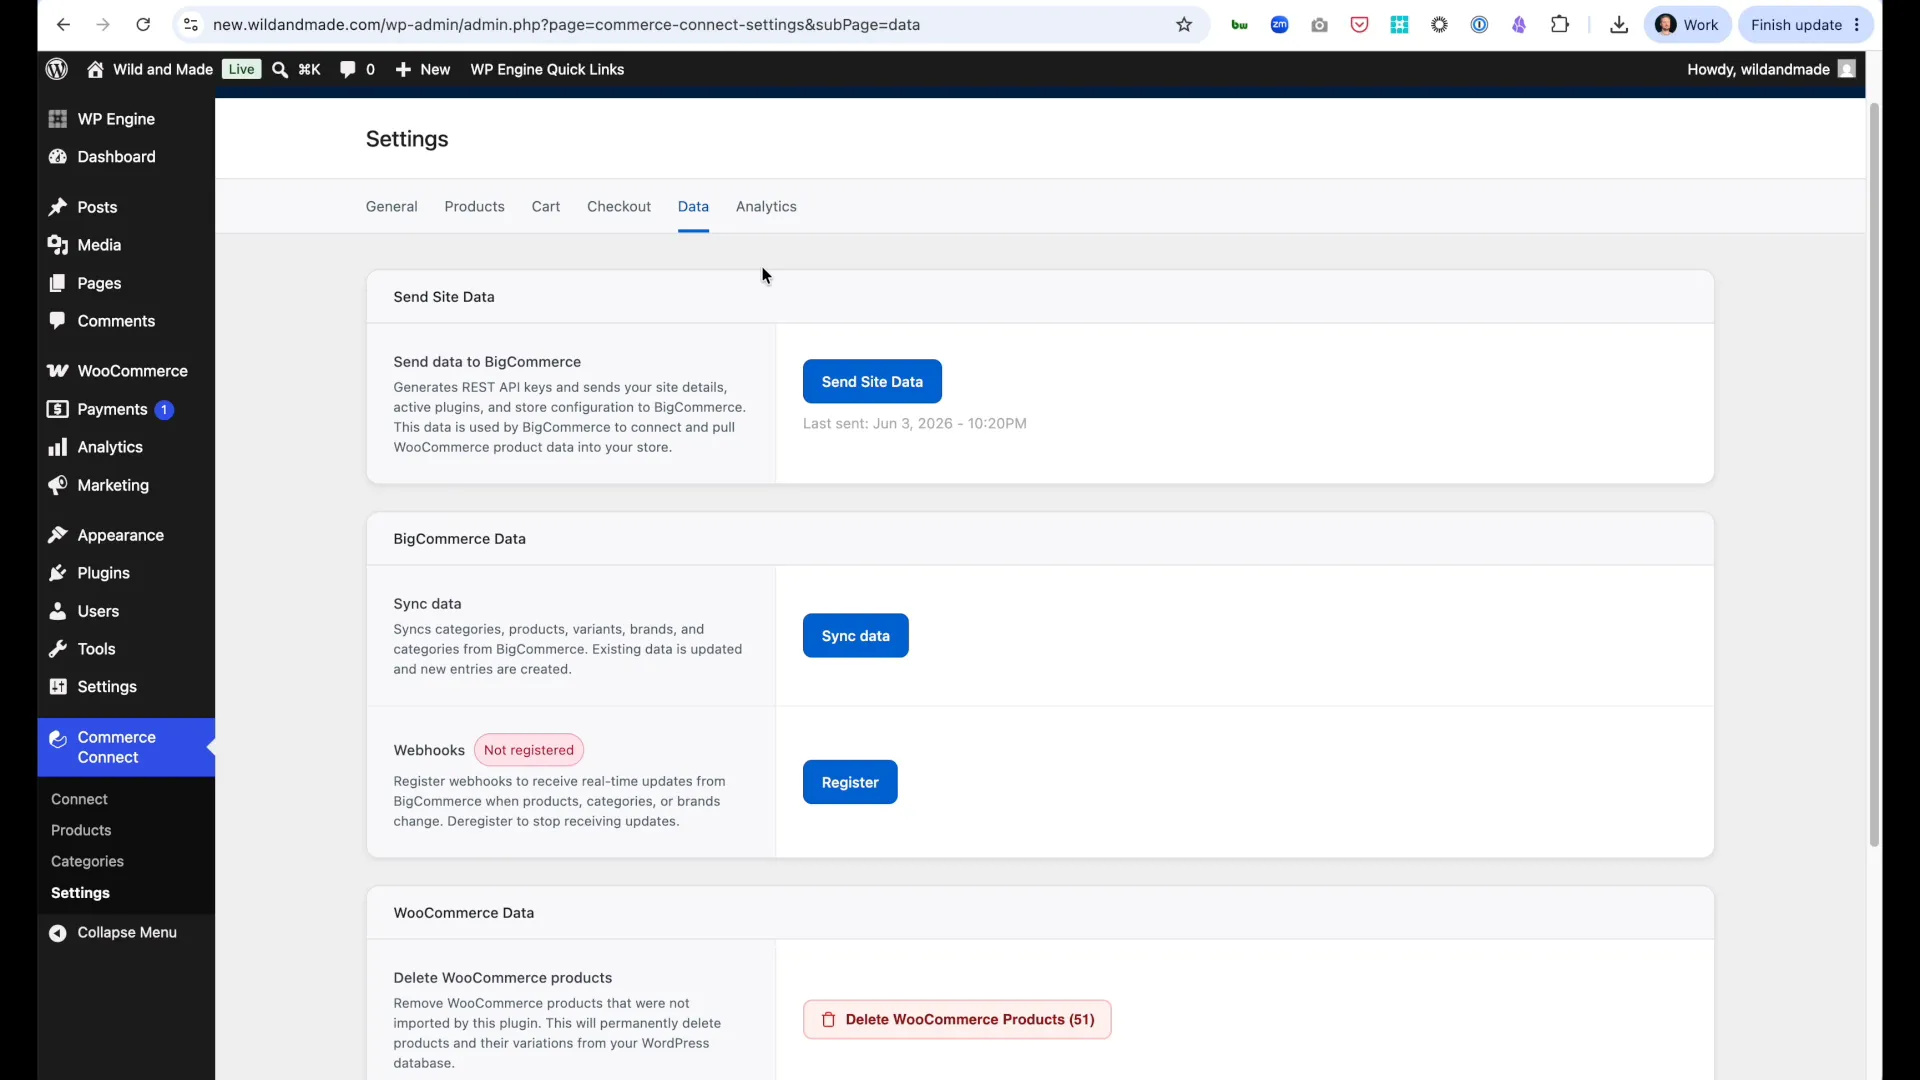
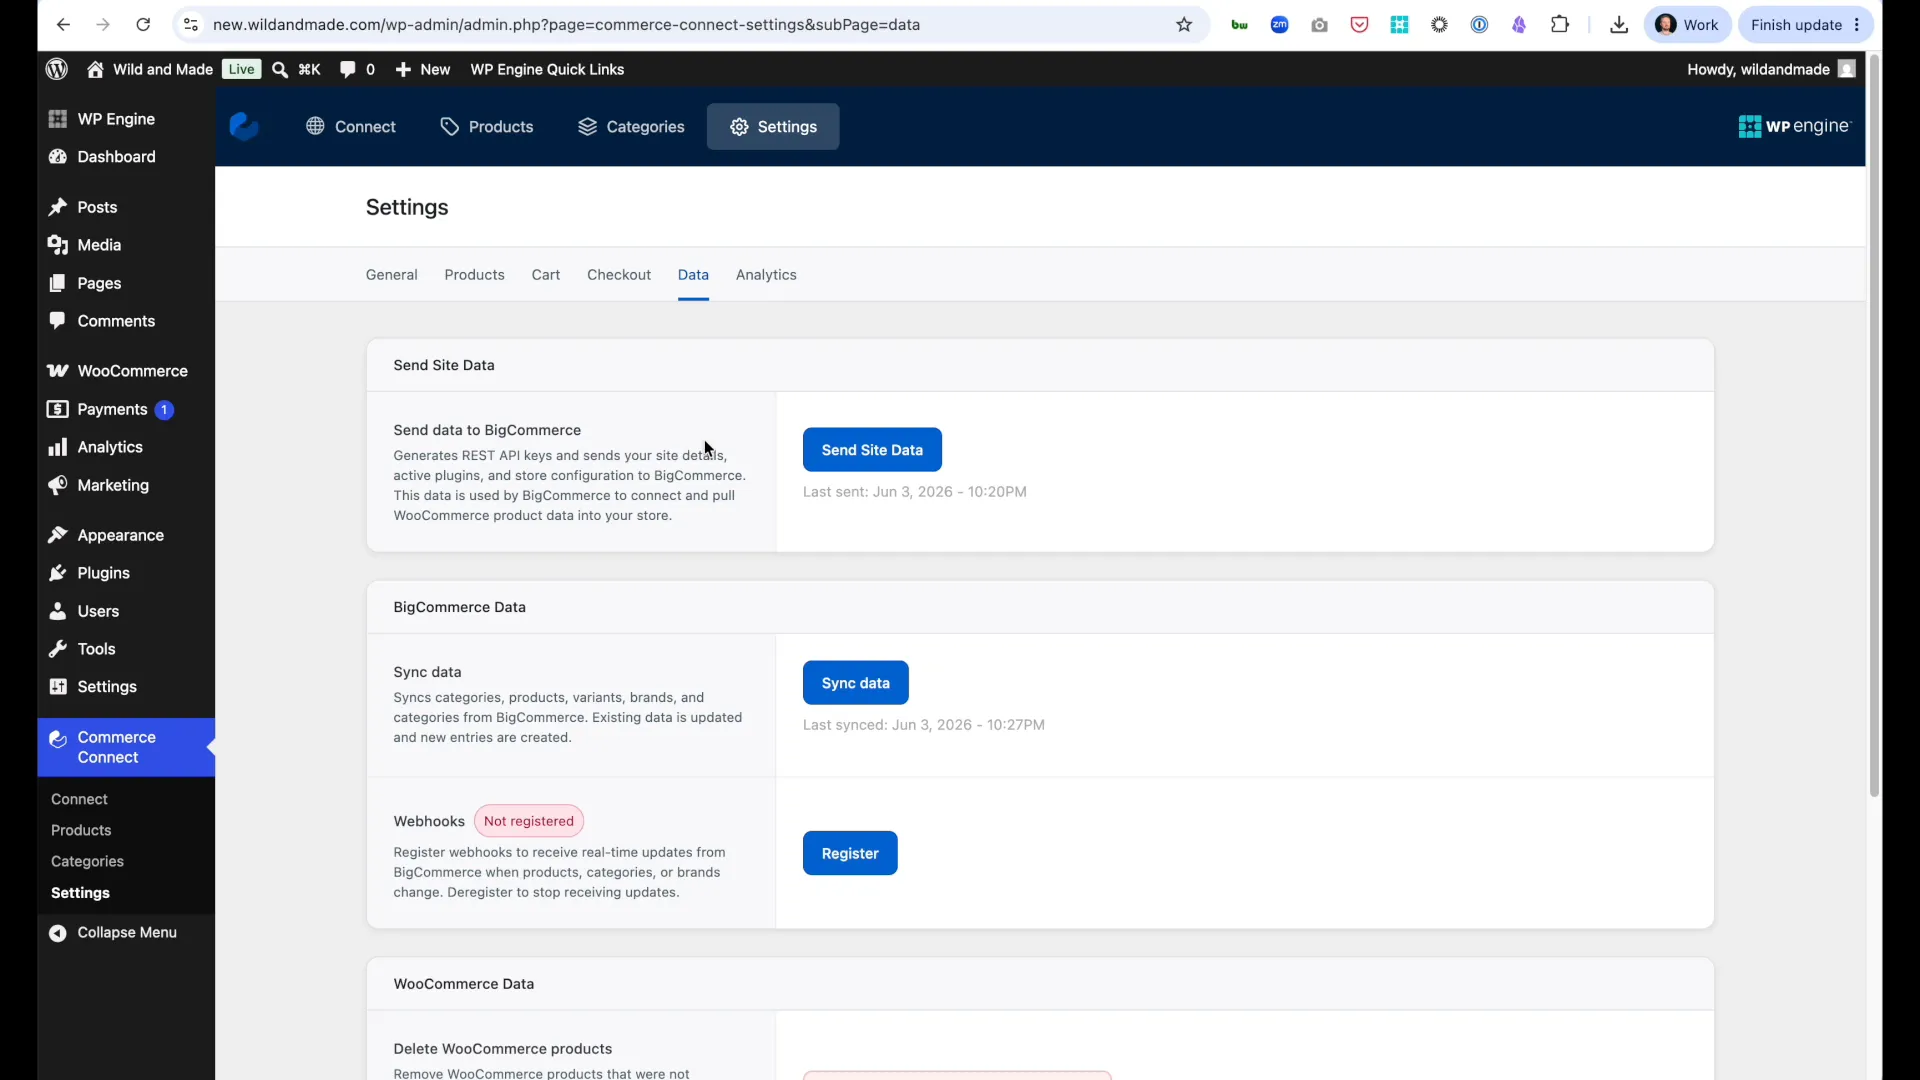
Webhooks (Real-Time Sync)
Section titled “Webhooks (Real-Time Sync)”Webhooks ensure that changes made in BigCommerce automatically sync to WordPress®.
Registering Webhooks
Section titled “Registering Webhooks”After completing data migration and product sync, register webhooks:
- Navigate to Commerce Connect → Settings → Webhooks
- Click Register Webhooks
- Wait for confirmation: “Webhooks successfully registered”
Result: Changes made in BigCommerce now automatically sync to WordPress®.
What Webhooks Sync
Section titled “What Webhooks Sync”Once registered, webhooks automatically sync:
- Product updates - Title, description, price changes
- Inventory changes - Stock levels, availability
- Price updates - Regular and sale prices
- Category changes - Product categorization
- Image updates - Product images and galleries
Sync happens quickly - no manual intervention required.
Troubleshooting Webhooks
Section titled “Troubleshooting Webhooks”If products aren’t syncing automatically:
- Navigate to Commerce Connect → Settings → Webhooks
- Check webhook status
- If webhooks show as inactive or failing, click Re-register Webhooks
- Verify webhooks successfully registered
Common issues:
- Webhooks not registered: Complete Step 14 in Installation guide
- Changes not syncing: Check BigCommerce admin permissions
- Sync delays: Normal sync time is seconds; if delays exceed 5 minutes, re-register webhooks
For developers: See WP-CLI Commands for programmatic webhook management.
Next Steps
Section titled “Next Steps”After completing configuration, verify everything works:
- Test your setup → - Verify product sync, checkout flow, and webhooks
- Add product blocks → - Create store pages with Commerce Connect blocks
- Customize templates → - Build custom product page layouts
- Troubleshoot issues → - Common problems and solutions