Getting Started with Commerce Connect
Choose Your Path
Section titled “Choose Your Path”Select the installation path that matches your situation:
Path A: Quick Setup (New Store)
Section titled “Path A: Quick Setup (New Store)”Best for:
- Starting a new Commerce Connect store
- Testing Commerce Connect features
- No existing WooCommerce store to migrate
What you’ll do:
- Install plugin on existing WP Engine site
- Connect to BigCommerce
- Sync products
- Add product blocks to pages
- Test checkout
Path B: Production Migration (WooCommerce)
Section titled “Path B: Production Migration (WooCommerce)”Best for:
- Migrating existing WooCommerce store to Commerce Connect
- Production site requiring careful transition
- Need DNS cutover planning
What you’ll do:
- Create site copy on WP Engine (never work on production)
- Complete migration workflow
- Configure checkout domains with DNS
- Register webhooks
- Full testing before cutover
Jump to Production Migration →
Quick Setup
Section titled “Quick Setup”Get a working storefront quickly. This path walks you through essential steps to display products and test checkout on an existing WP Engine site.
What You’ll Accomplish
Section titled “What You’ll Accomplish”- ✅ Commerce Connect plugin installed and activated
- ✅ BigCommerce store connected
- ✅ Products synced and displayed on your site
- ✅ Working checkout flow verified
Prerequisites
Section titled “Prerequisites”- WP Engine WordPress site (Full Site Editor theme required)
- BigCommerce account (free trial available during setup)
- Admin access to WordPress
Step 1: Install Commerce Connect
Section titled “Step 1: Install Commerce Connect”- Log into your WordPress admin
- Navigate to Plugins → Add New Plugin
- Search for “Commerce Connect”
- Click Install Now, then Activate
Result: Commerce Connect menu appears in WordPress sidebar.
Step 2: Connect to BigCommerce
Section titled “Step 2: Connect to BigCommerce”- In WordPress admin, click Commerce Connect → Connect
- Click Continue to start the connection flow
- New window opens with BigCommerce signup form:
- Enter your business name
- Enter your email and password
- Click Create Store
- Copy the authorization code displayed
- Paste the code in the BigCommerce authorization window
- Click Authorize
Result: You now have a BigCommerce store automatically connected to WordPress.

Step 3: Sync Your Products
Section titled “Step 3: Sync Your Products”Option A: Add Products in BigCommerce (New Store)
Section titled “Option A: Add Products in BigCommerce (New Store)”If starting fresh:
- Open BigCommerce admin (use credentials from Step 2)
- Navigate to Products → Add
- Fill in product details:
- Product name
- Price
- Upload image
- Description
- Click Save
- Return to WordPress admin
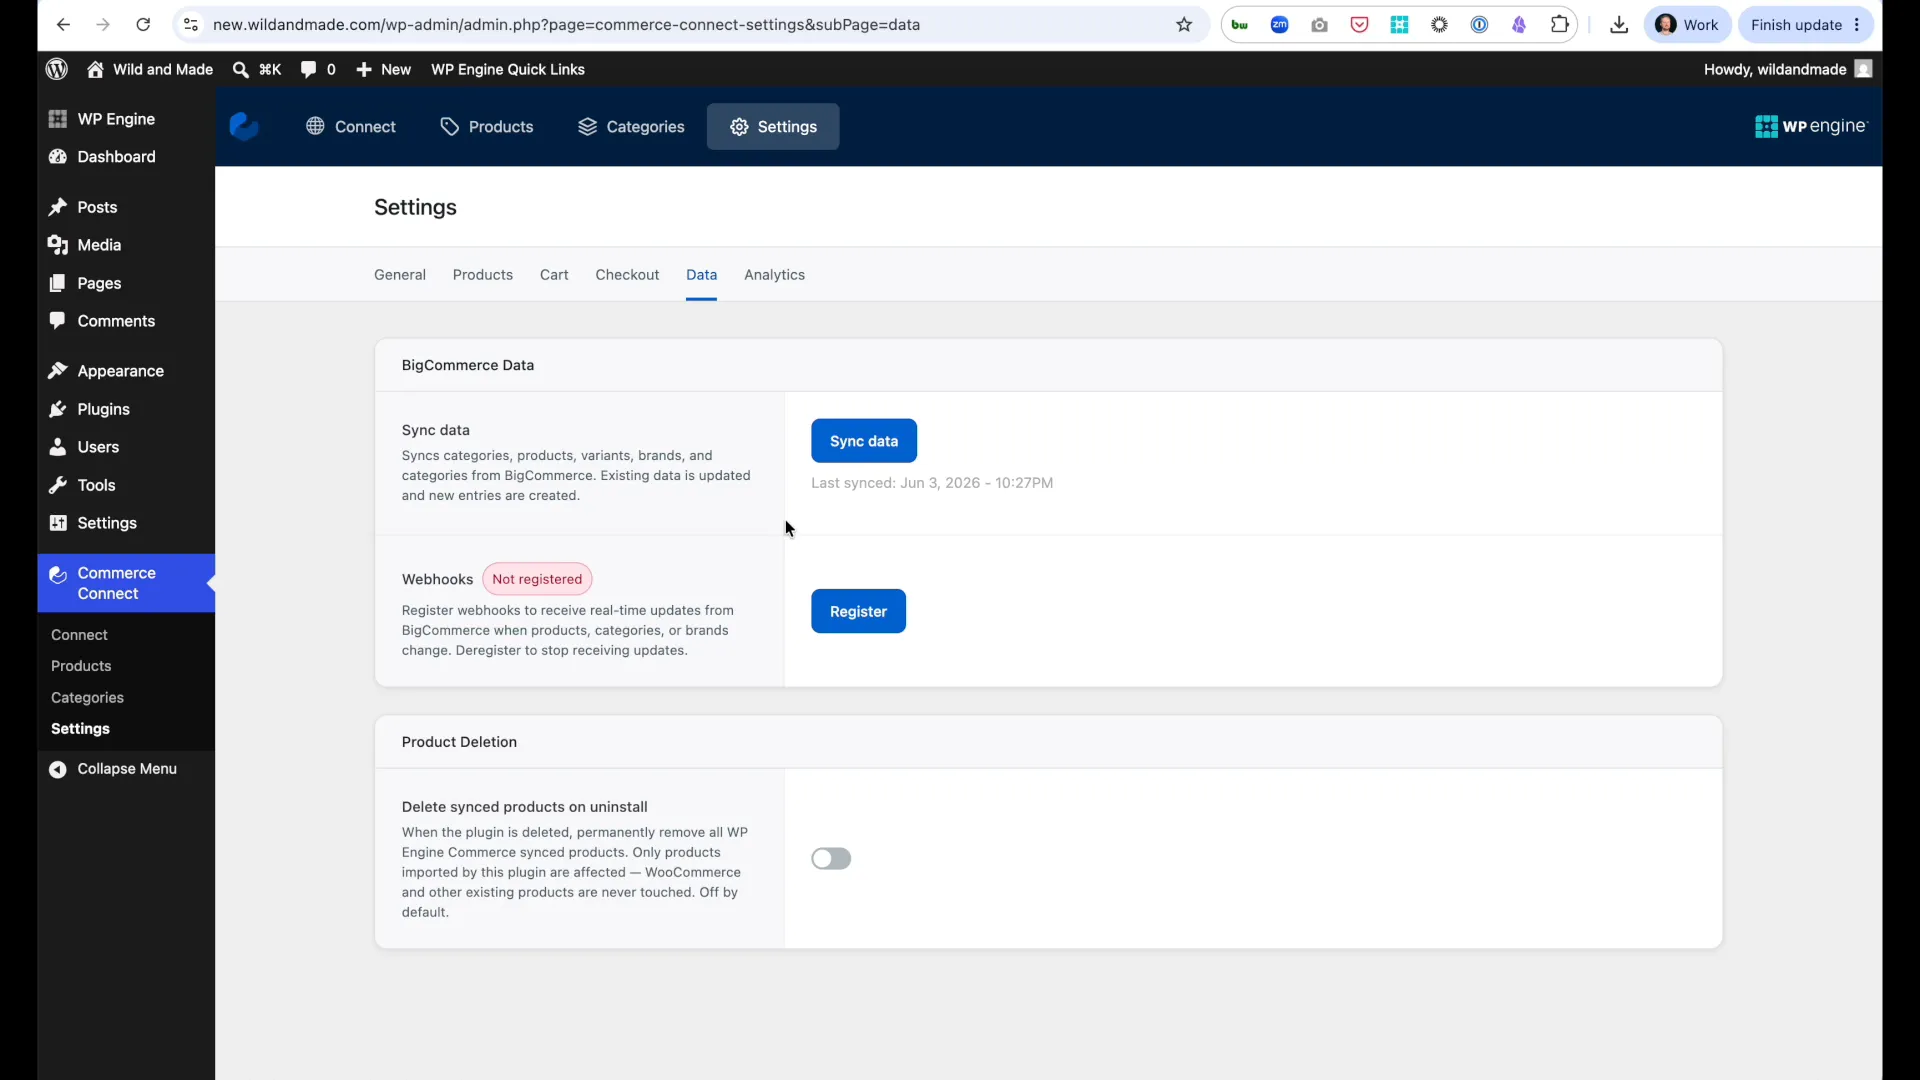
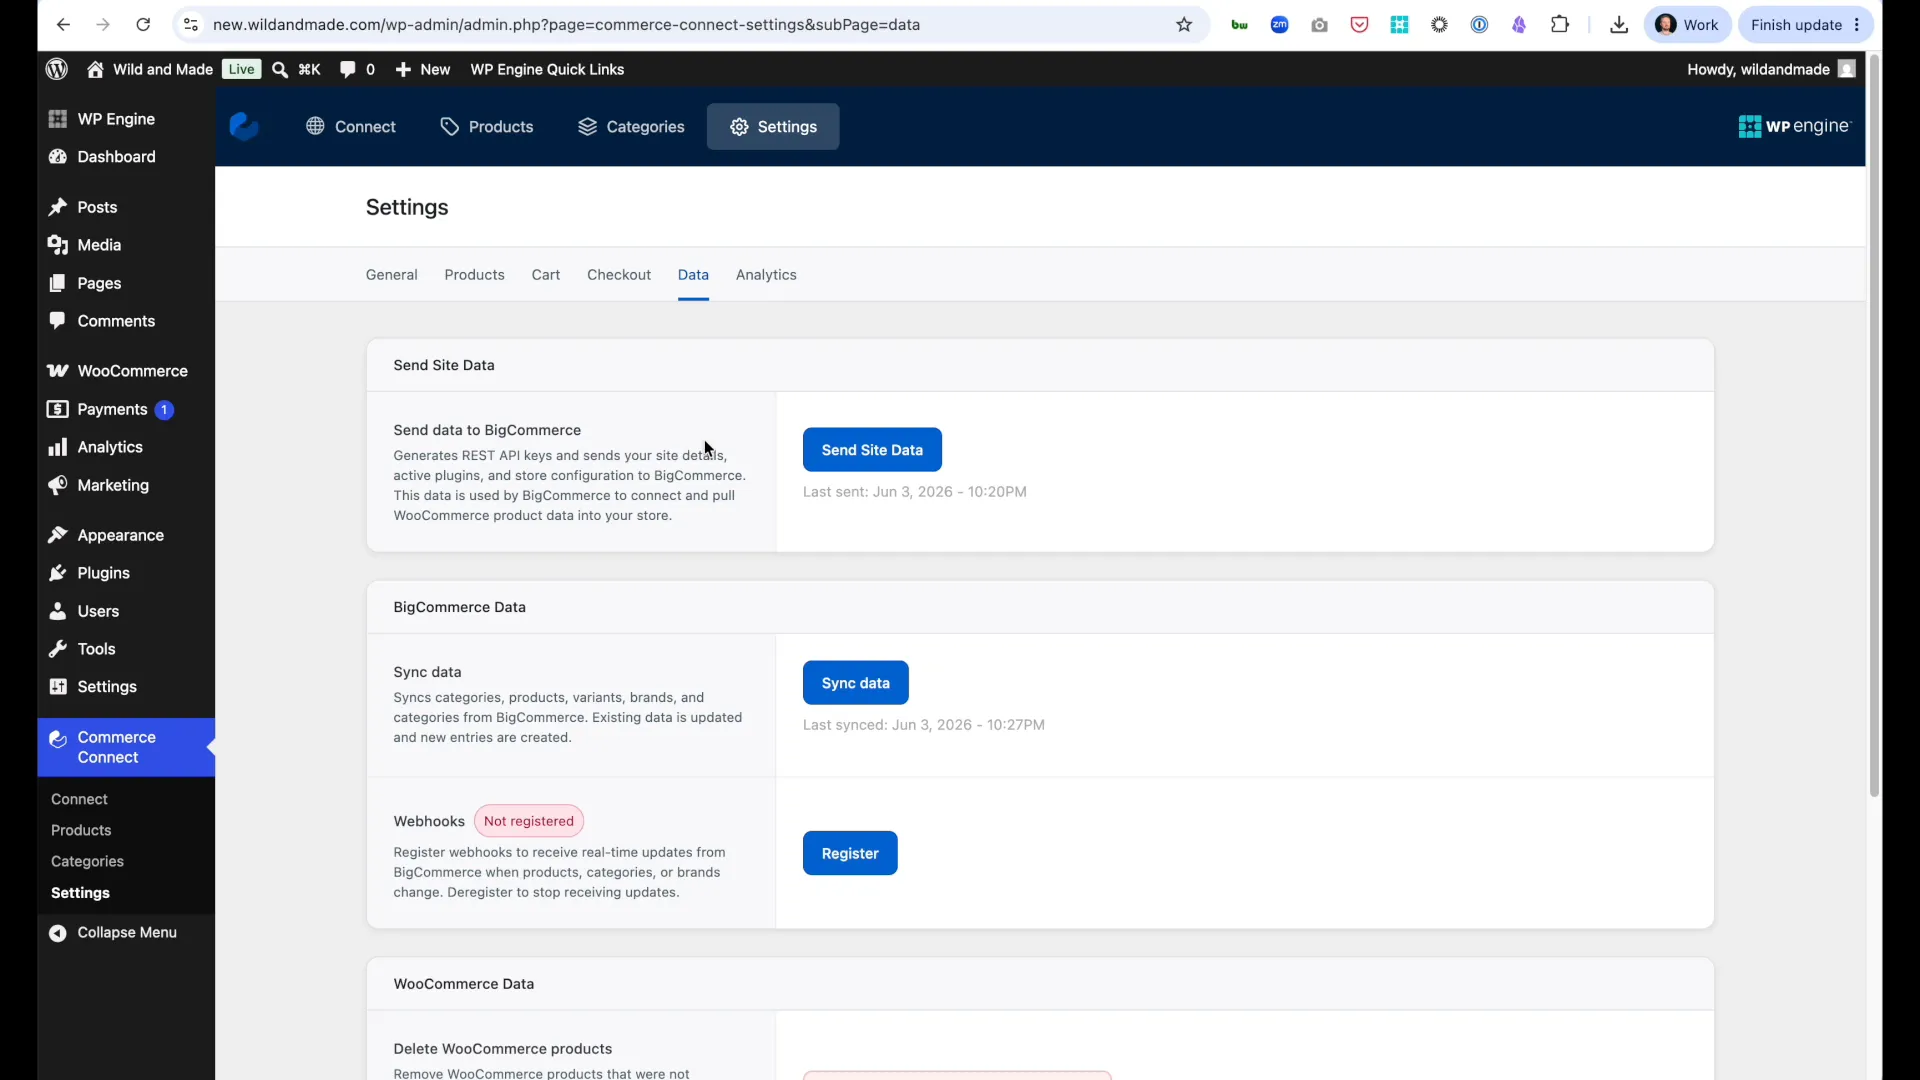
- Navigate to Commerce Connect → Settings → Data
- Click Sync Products Now
Result: Products from BigCommerce appear in WordPress.
Option B: Import from WooCommerce (Migrating)
Section titled “Option B: Import from WooCommerce (Migrating)”If you’re moving from WooCommerce:
- Log into BigCommerce admin
- Navigate to Products → Import
- Select WooCommerce as import source
- Follow BigCommerce’s migration wizard
- Return to WordPress admin
- Navigate to Commerce Connect → Settings → Data
- Click Sync Products Now
Result: All WooCommerce products copied to BigCommerce and synced to WordPress.
For detailed migration guidance: See WooCommerce Migration Guide
Step 4: Add Products to a Page
Section titled “Step 4: Add Products to a Page”Now display products on your WordPress site:
- In WordPress admin, navigate to Pages → Add New Page
- Page Title: “Shop” (or “Store”, “Products”, etc.)
- Click the + button to add a block
- Search for “Commerce Connect Products”
- Insert the Commerce Connect Products Grid block
- Configure block settings (right sidebar):
- Columns (Desktop): 3
- Products Per Page: 12
- Show Image: ✓
- Show Price: ✓
- Click Publish
Result: Products display in a grid layout with images and prices.
Step 5: Test Checkout
Section titled “Step 5: Test Checkout”Verify the complete shopping experience:
- Click View Page to see your shop page
- Click Add to Cart on any product
- Click Checkout or View Cart
- You’re redirected to your checkout domain (e.g.,
checkout.yourdomain.com) - Verify BigCommerce checkout page loads correctly
- Verify product appears in cart with:
- Correct image
- Correct title
- Correct price
Result: If checkout loads and displays your product, Commerce Connect is working!
Quick Setup: What’s Next?
Section titled “Quick Setup: What’s Next?”Customize Your Store
Section titled “Customize Your Store”Enhance your storefront with additional blocks:
- Products Filters - Let customers filter by category, price, attributes
- Products Search Box - Add search functionality
- Cart Icon - Display cart status in header
Explore all blocks: Block Catalog
Create Product Detail Pages
Section titled “Create Product Detail Pages”Build individual product pages:
- Create a new page or template
- Add single product blocks:
Learn more: Adding Your First Blocks
Configure Your Store
Section titled “Configure Your Store”Fine-tune your Commerce Connect settings:
- Product sync settings - Control how products sync
- Checkout domain configuration - Set custom checkout subdomain
- Webhook registration - Enable automatic product sync
Track Performance
Section titled “Track Performance”Monitor your store’s success:
Production Migration
Section titled “Production Migration”Recommended Workflow
Section titled “Recommended Workflow”We recommend installing Commerce Connect on a non-production WP Engine site first. This allows you to configure, test, and verify everything before making it your live site.
Complete Migration Workflow
Section titled “Complete Migration Workflow”Follow this exact sequence for successful Commerce Connect migration:
Phase 1: Create Site Copy
Phase 2: Install & Connect Plugin
Phase 3: Add Products
Phase 4: Configure Checkout
Phase 5: Setup Webhooks & Theme
Phase 6: Test & Verify
Phase 1: Create Site Copy
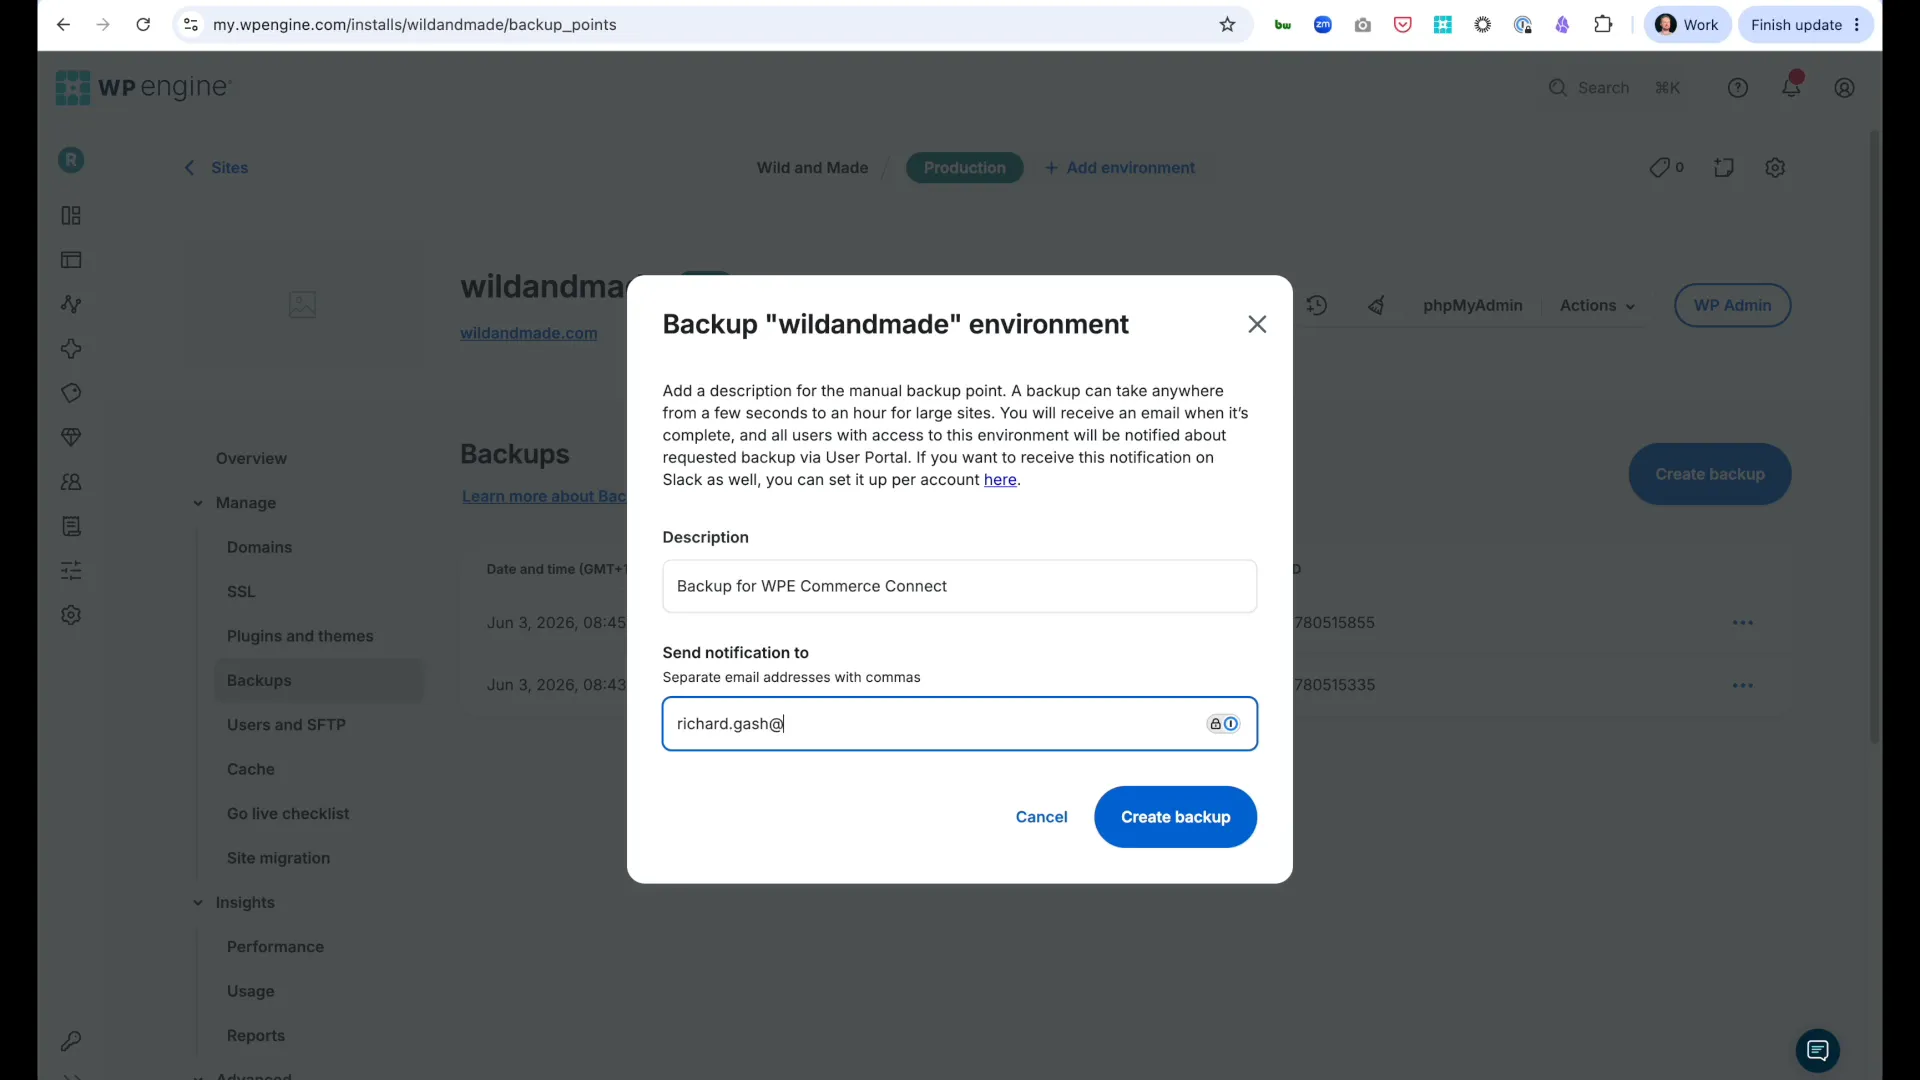
Section titled “Phase 1: Create Site Copy”Step 1: Create Backup of Production Site
Section titled “Step 1: Create Backup of Production Site”- Log into WP Engine User Portal
- Locate your production site
- Navigate to Backups
- Click Create Backup
- Backup Name: “Commerce Connect Migration”
- Email: Enter notification email
- Click Create Backup
- Wait for email confirming backup completion
Step 2: Copy Environment from Backup
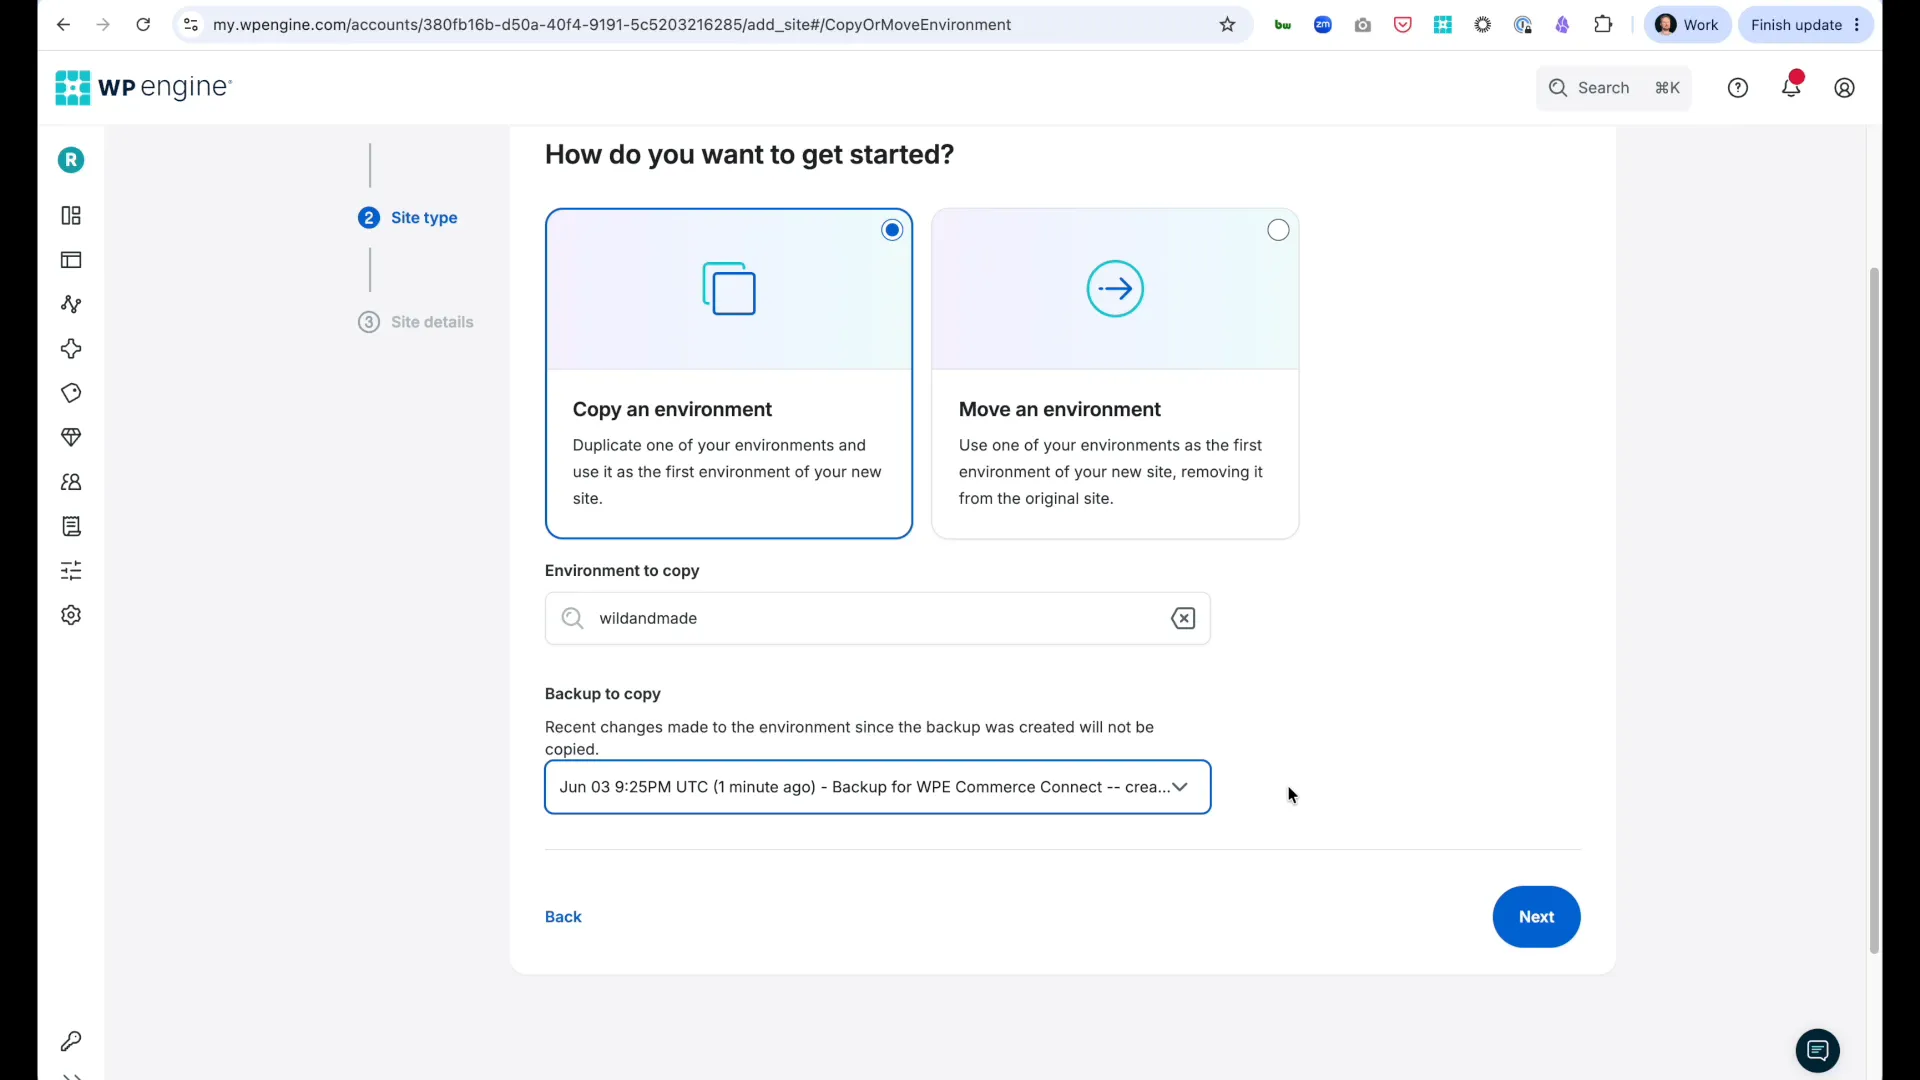
Section titled “Step 2: Copy Environment from Backup”- In WP Engine User Portal, click Sites → Add Site
- Select Copy or Move an Environment
- Click Get Started
- Select I will own it
- Choose your production site as source
- Select the backup you just created
- New Site Name: Enter name for new environment (e.g., “mystore-new”)
- Click Add Site
- Wait for email confirming environment is ready
Result: You now have an exact copy of your production site where all Commerce Connect work will be performed.
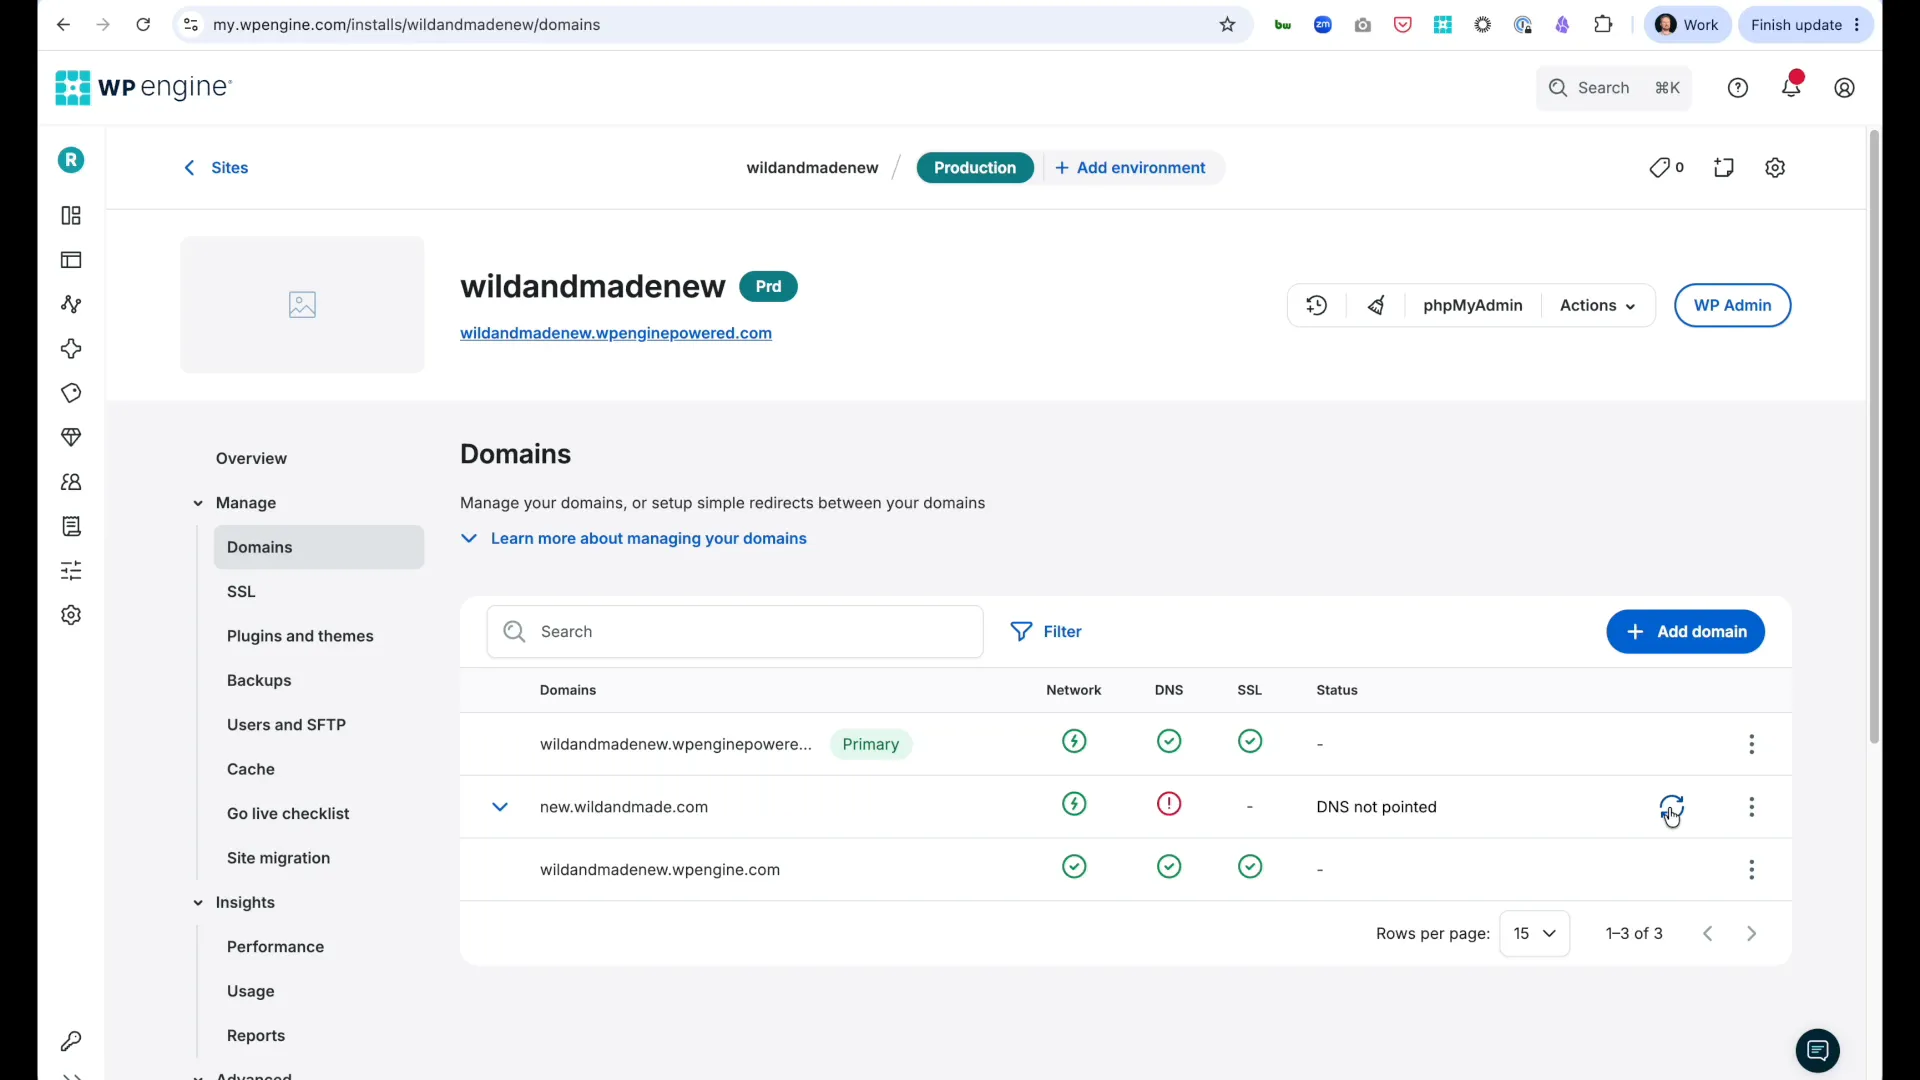
Step 3: Configure Domain for New Site
Section titled “Step 3: Configure Domain for New Site”Why needed: Commerce Connect requires a domain to enable checkout functionality.
- In WP Engine User Portal, open your new site
- Navigate to Domains
- Add Domain:
- Domain:
new.yourdomain.com(or similar subdomain) - ☑ Enable Full Page Caching
- Domain:
- Click Add and Setup Domain
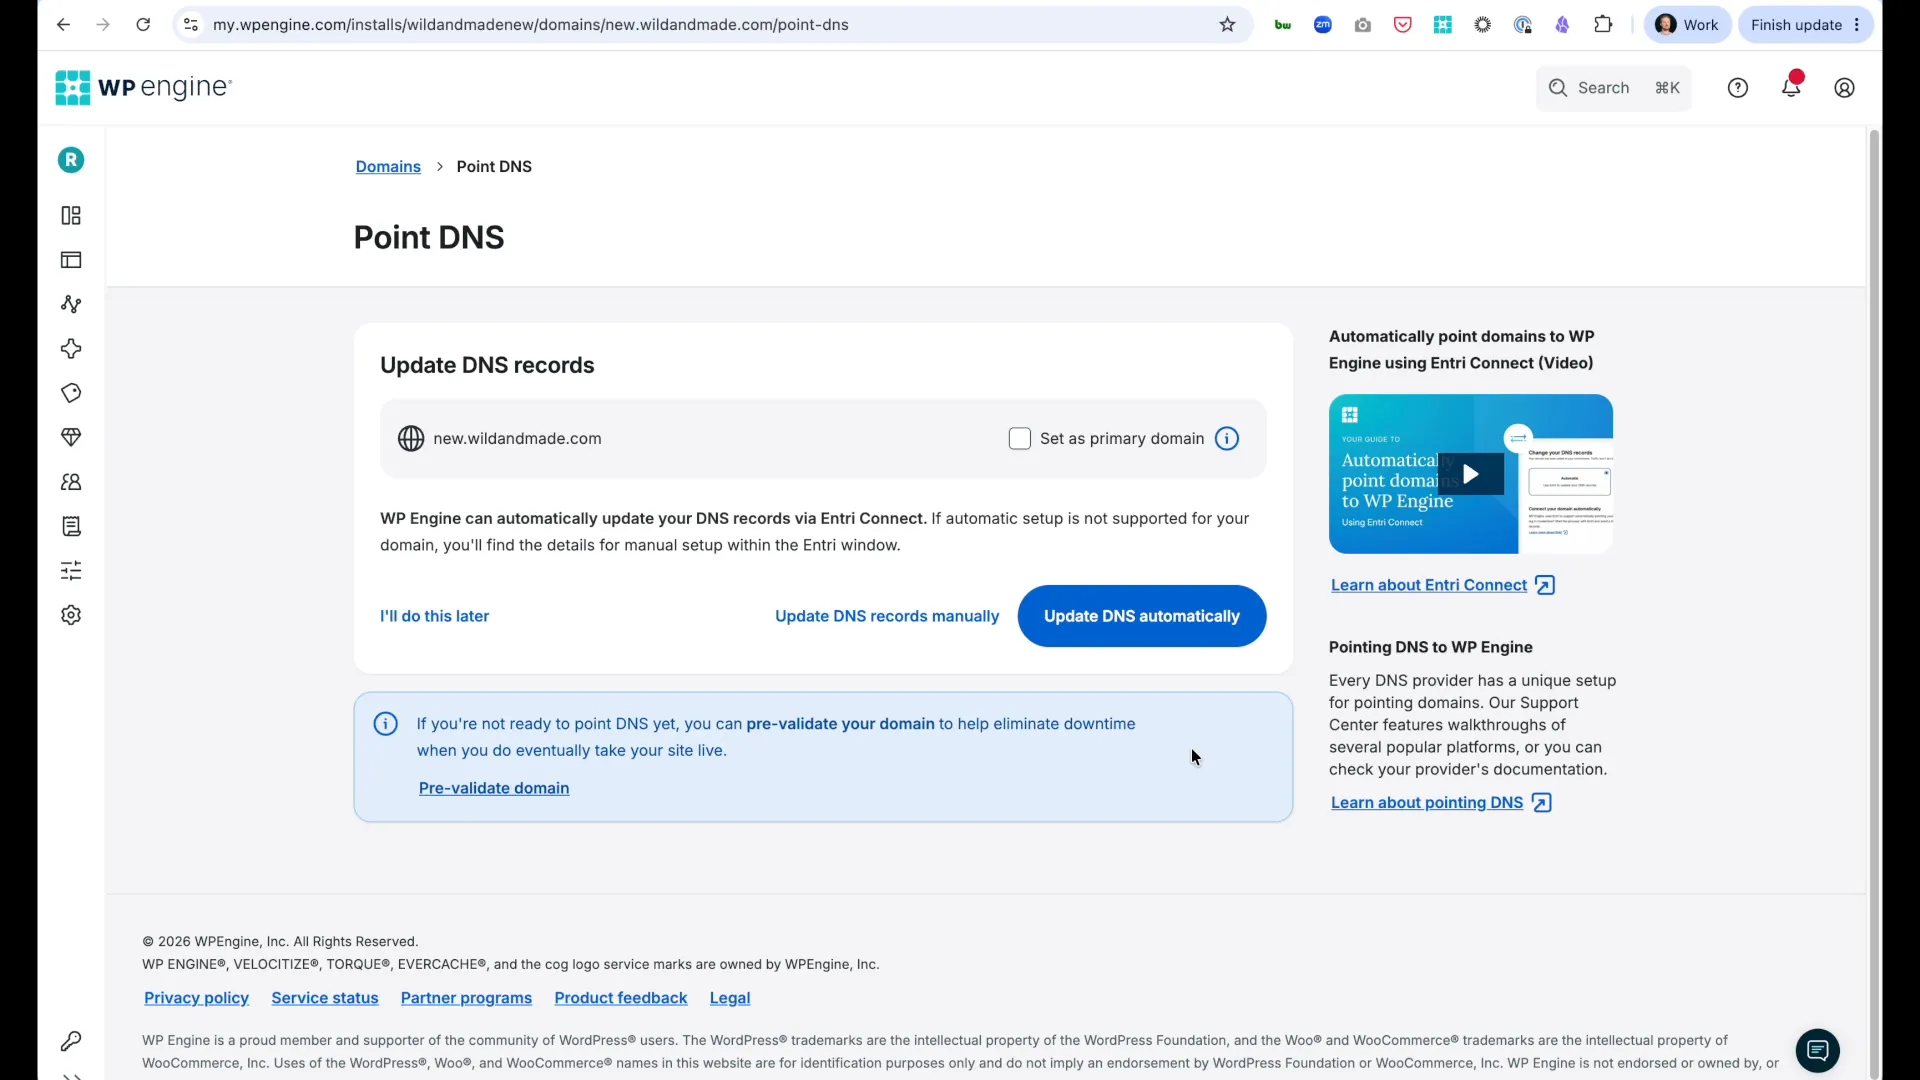
Step 4: Update DNS Records
Section titled “Step 4: Update DNS Records”Option A: Automatic (Cloudflare users)
Section titled “Option A: Automatic (Cloudflare users)”- Click Entry Connect button
- Authorize with Cloudflare
- DNS updates automatically
- Wait for status to change to “DNS Pointed”
Option B: Manual
Section titled “Option B: Manual”- Follow DNS instructions provided by WP Engine
- Create required CNAME or A record in your DNS provider
- Wait for DNS propagation
- Verify status shows “DNS Pointed”
Verify: Visit new.yourdomain.com - you should see your site.
Phase 2: Install and Connect Plugin
Section titled “Phase 2: Install and Connect Plugin”Step 5: Update WordPress Settings
Section titled “Step 5: Update WordPress Settings”- Log into WordPress admin on your NEW site (
new.yourdomain.com/wp-admin) - Navigate to Settings → General
- Update both URLs to your new domain:
- WordPress Address (URL):
https://new.yourdomain.com - Site Address (URL):
https://new.yourdomain.com
- WordPress Address (URL):
- Click Save Changes

Step 6: Install Commerce Connect Plugin
Section titled “Step 6: Install Commerce Connect Plugin”- Navigate to Plugins → Add New Plugin
- Click Upload Plugin
- Choose the Commerce Connect ZIP file provided by WP Engine
- Click Install Now
- Click Activate
Result: Commerce Connect appears in your WordPress admin sidebar.
Step 7: Create BigCommerce Trial Account
Section titled “Step 7: Create BigCommerce Trial Account”- Navigate to Commerce Connect → Connect
- Click Continue
- New window opens - fill out BigCommerce signup:
- First Name, Last Name, Email
- Store Name (matches your business)
- Password
- Click Create Store
- Copy the authorization code displayed
- In BigCommerce window, paste the code
- Click Authorize
Result: Commerce Connect Connect tab now shows:
- Store Name
- Connected status
You can now log into BigCommerce admin with the credentials you created.
Phase 3: Add Products
Section titled “Phase 3: Add Products”Option A: Migrate from WooCommerce
Section titled “Option A: Migrate from WooCommerce”If you have an existing WooCommerce store:
Follow the complete WooCommerce to BigCommerce migration guide → for data migration, product sync, and theme transition.
Option B: Start Fresh (No Existing Store)
Section titled “Option B: Start Fresh (No Existing Store)”If starting a new store:
- Log into your BigCommerce admin
- Navigate to Products → Add
- Create your first products manually
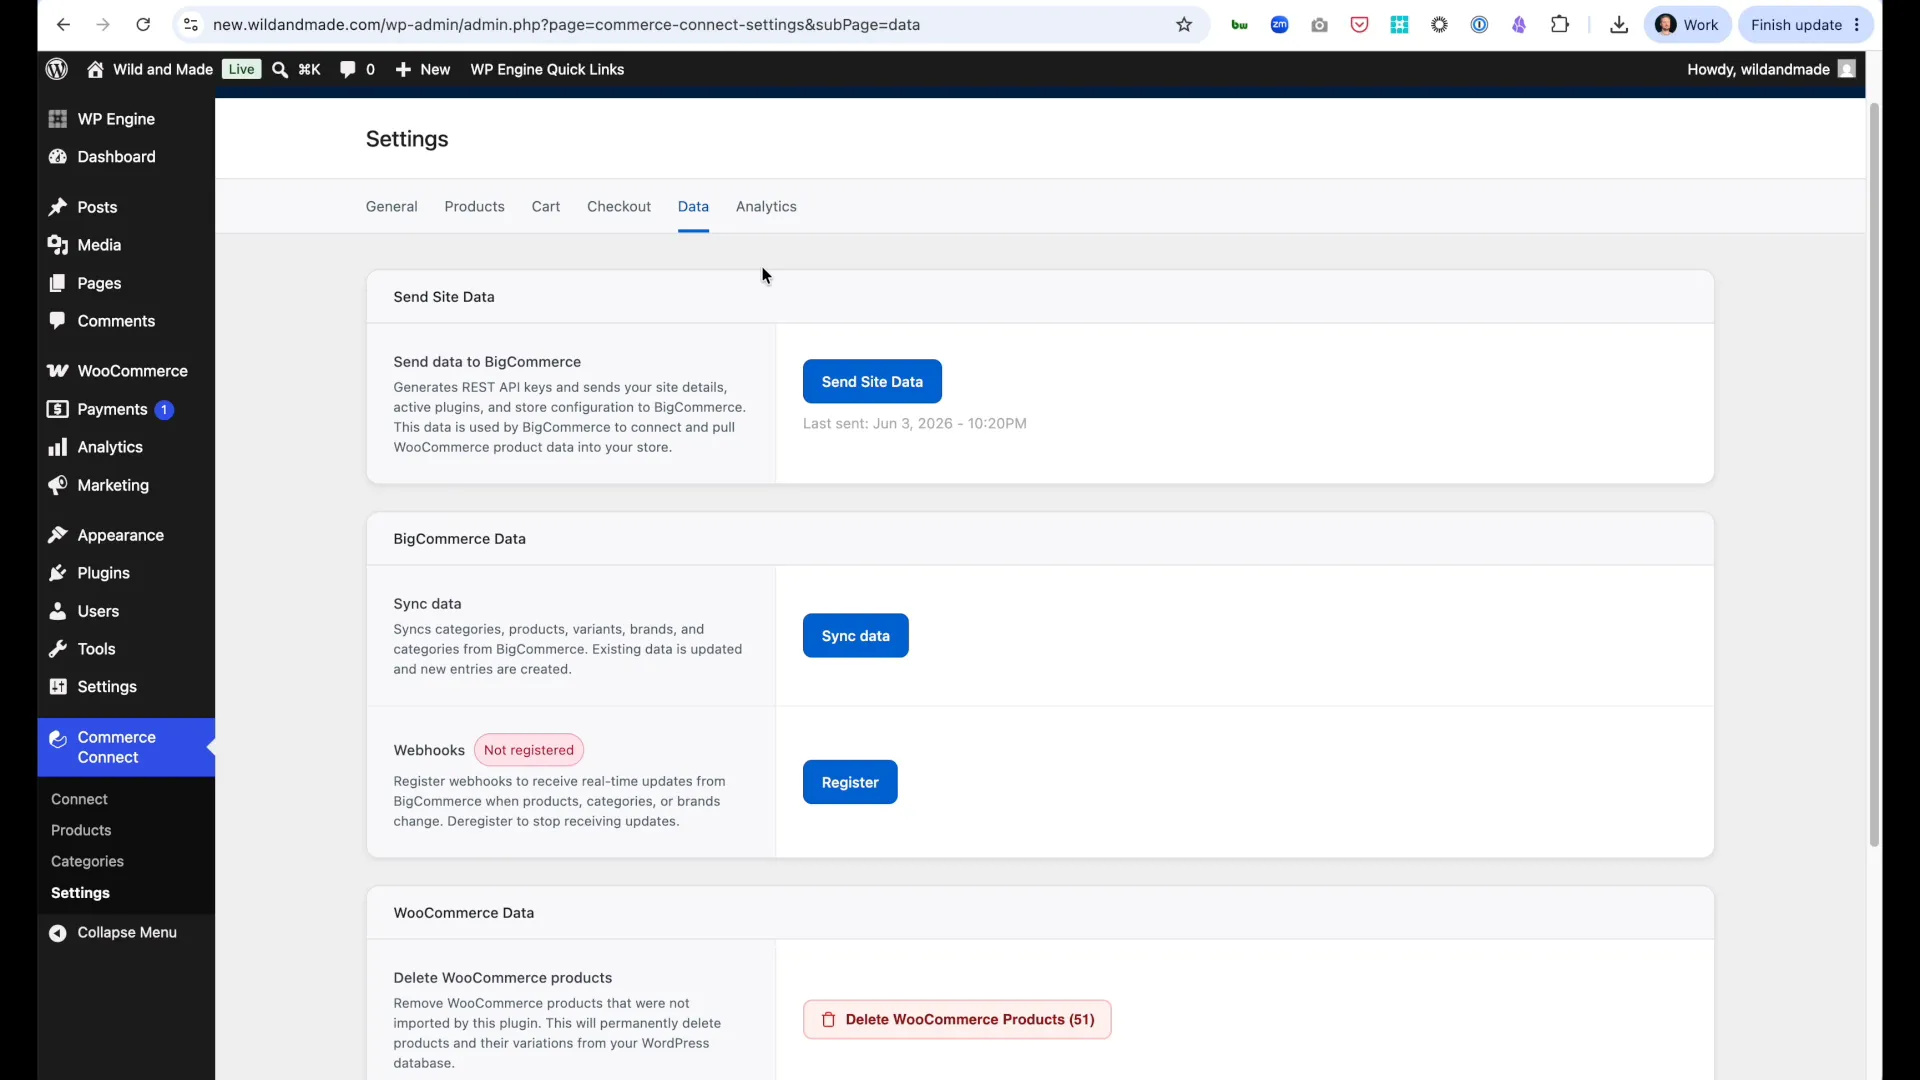
- Return to WordPress and click Commerce Connect → Settings → Data → Sync Products
- Verify products appear in Commerce Connect → Products
Once products are synced to Commerce Connect, continue to Phase 4 below.
Phase 4: Configure Checkout
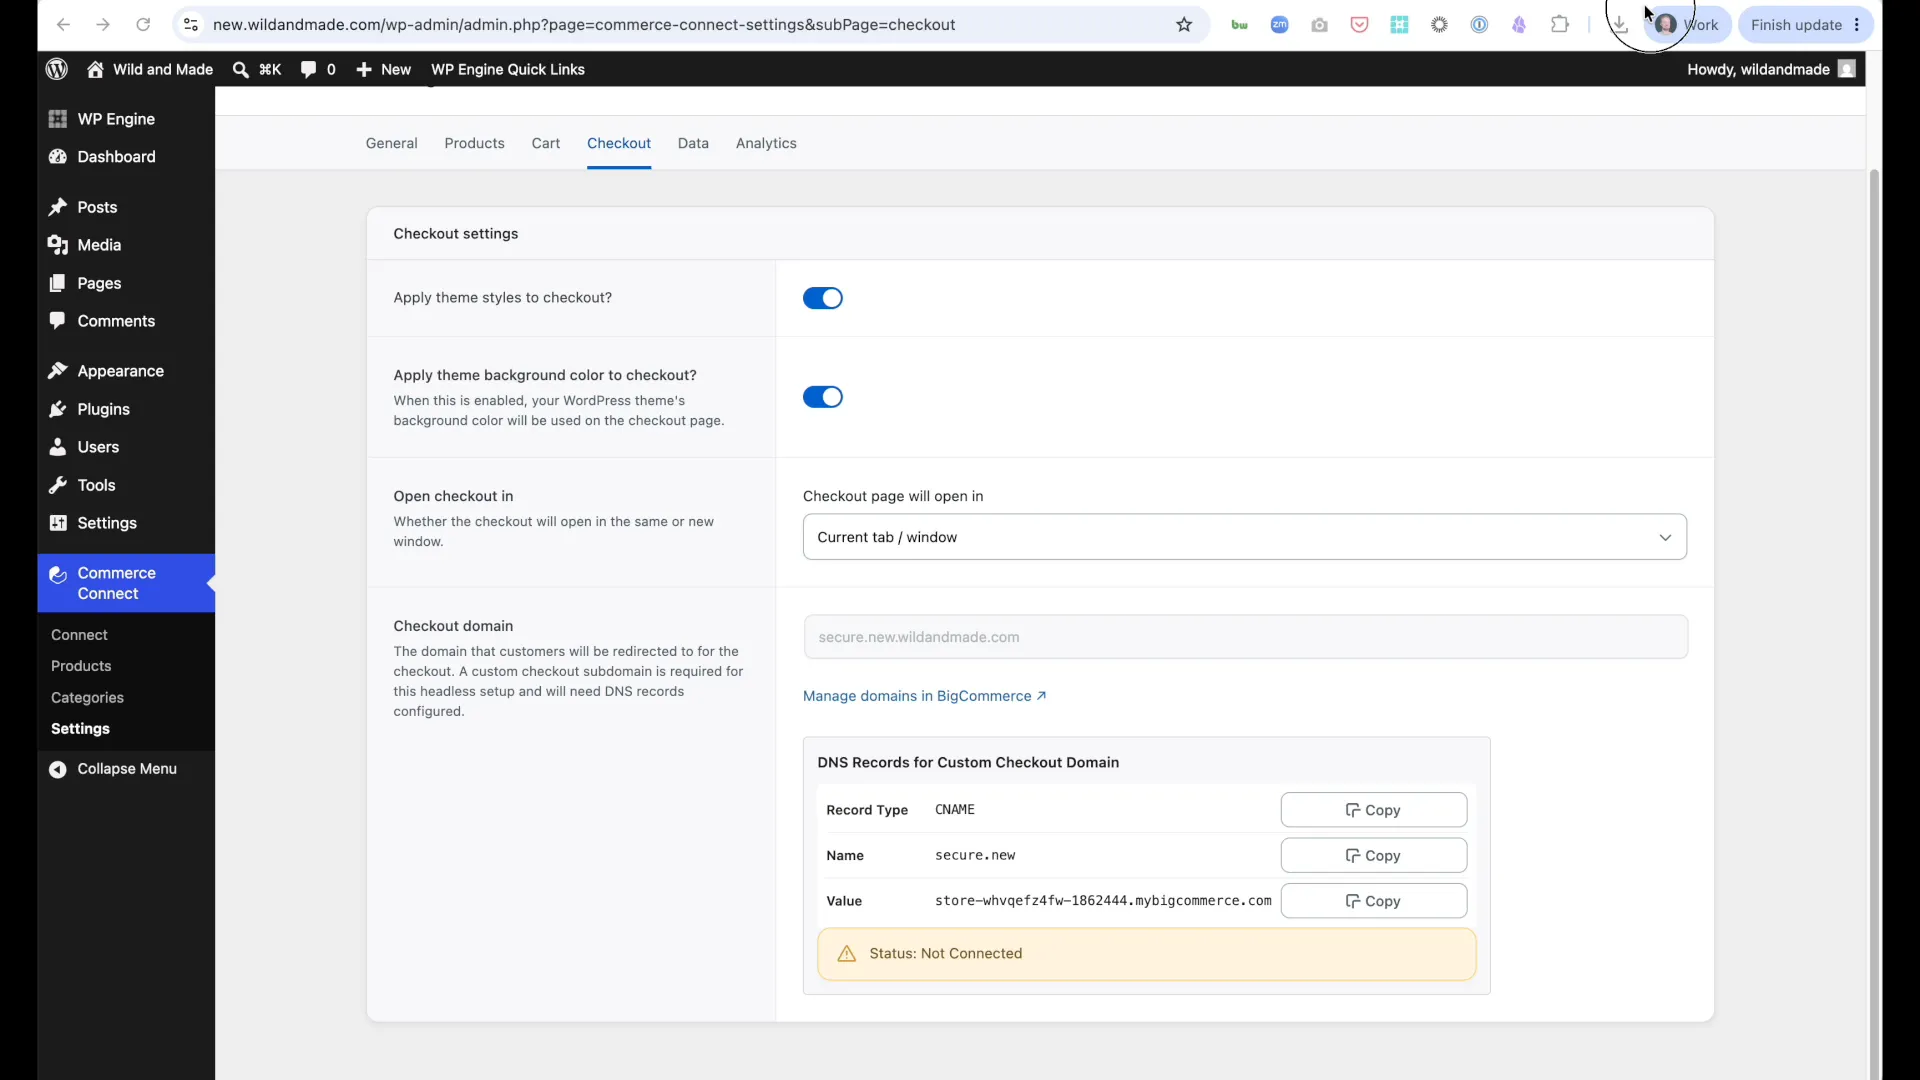
Section titled “Phase 4: Configure Checkout”Step 12: Set Custom Checkout Domain
Section titled “Step 12: Set Custom Checkout Domain”Default: checkout.new.yourdomain.com
Recommended: Custom subdomain like secure.new.yourdomain.com
- Navigate to Commerce Connect → Settings
- Note current checkout domain
- Click Manage Domains (opens BigCommerce)
- In BigCommerce:
- Disconnect current checkout domain
- Click Connect Custom Domain
- Enter:
secure.new.yourdomain.com - Click Next
- Select Add SSL Later
- Complete setup
Step 13: Configure DNS for Checkout Domain
Section titled “Step 13: Configure DNS for Checkout Domain”- Log into your DNS provider (e.g., Cloudflare)
- Add CNAME record:
- Type:
CNAME - Name:
secure.new(subdomain only) - Value: BigCommerce URL provided (e.g.,
[hash].mybigcommerce.com) - Proxy: DNS Only (not proxied)
- Type:
- Save record
Wait for propagation:
- Use dnschecker.org to verify
- Search:
secure.new.yourdomain.com - Type: CNAME
Verify in plugin:
- Return to Commerce Connect → Settings
- Refresh page
- Checkout domain should show custom domain
- Status should be “Connected”
Phase 5: Setup Webhooks and Theme
Section titled “Phase 5: Setup Webhooks and Theme”Step 14: Register Webhooks
Section titled “Step 14: Register Webhooks”Purpose: Sync BigCommerce changes automatically to WordPress
- Navigate to Commerce Connect → Settings → Webhooks
- Click Register Webhooks
- Wait for confirmation: “Webhooks successfully registered”
Result: Product updates, inventory changes, and price changes in BigCommerce now automatically sync to WordPress.
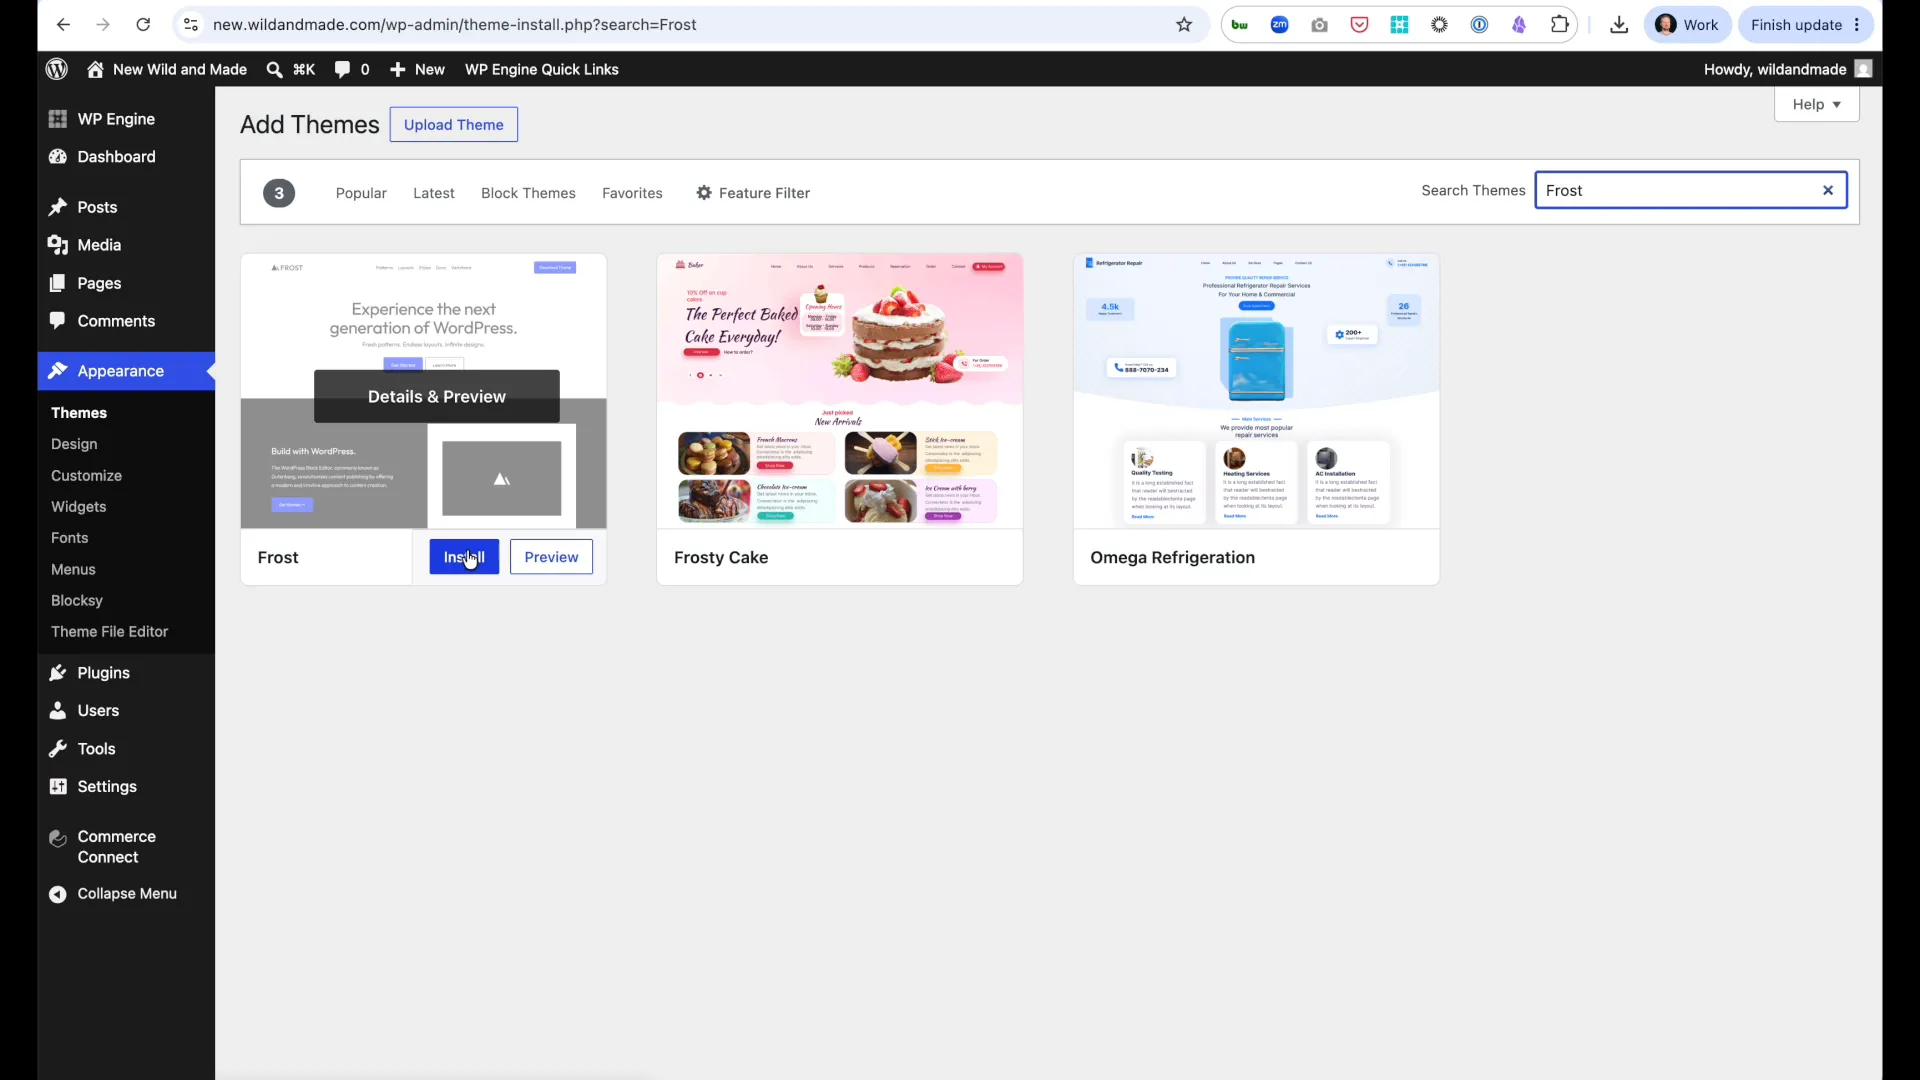
Step 15: Activate Full Site Editor Theme
Section titled “Step 15: Activate Full Site Editor Theme”Requirement: Commerce Connect requires a Full Site Editor (block) theme.
- Navigate to Appearance → Themes
- Activate a Full Site Editor theme
- Recommended: Frost, or any modern block theme
- Not compatible: Classic WordPress themes
- Preview site to confirm theme active
Optional: Update site title in Settings → General to distinguish from production (e.g., add “NEW” prefix).
Phase 6: Test and Verify
Section titled “Phase 6: Test and Verify”Step 16: Create Store Page and Test Checkout
Section titled “Step 16: Create Store Page and Test Checkout”Create store page:
- Navigate to Pages → Add New Page
- Title: Store
- Add block: Search for “Commerce Connect Products”
- Insert Commerce Connect Products Block
- Click Publish
Test complete shopping flow:
- Visit store page:
new.yourdomain.com/store - Verify: Products display correctly
- Click Add to Cart on a product
- Click Checkout
- Verify redirect: Should go to
secure.new.yourdomain.com - Verify: BigCommerce checkout loads correctly
Critical checks before going live:
- ✅ Products display with images, prices, descriptions
- ✅ Add to Cart works
- ✅ Checkout redirect functions
- ✅ Custom checkout domain loads
- ✅ Checkout form displays
Production Migration: Next Steps
Section titled “Production Migration: Next Steps”After completing installation:
- Test thoroughly → - Verify all functionality
- Add product blocks → - Create store pages
- Configure analytics → - Set up tracking
- Plan DNS cutover - Schedule go-live
Prerequisites
Section titled “Prerequisites”Before starting, ensure you have:
- WordPress 6.5+ (supports WordPress 7.0)
- PHP 8.2+
- WP Engine hosting
- Full Site Editor theme (block-based theme)
- WooCommerce site to migrate from (if applicable)
- Domain access to update DNS records
Troubleshooting
Section titled “Troubleshooting”Products Not Showing in Grid
Section titled “Products Not Showing in Grid”Solution: Trigger product sync at Commerce Connect → Settings → Data → Sync Products Now. Wait for sync to complete, then reload page.
Images Missing
Section titled “Images Missing”Solution:
- Check Commerce Connect → Products - do images show there?
- If yes: Clear WordPress cache
- If no: Go to Commerce Connect → Settings → Data and click Sync Products
Checkout Doesn’t Load
Section titled “Checkout Doesn’t Load”Solution: DNS not configured for checkout domain.
- Verify DNS at dnschecker.org
- Search for your checkout domain (e.g.,
secure.yourdomain.com) - Type: CNAME
- If DNS not propagated, check DNS provider settings
Plugin Won’t Activate
Section titled “Plugin Won’t Activate”Check: PHP and WordPress version requirements met
Solution: Upgrade PHP to 8.2+ or WordPress to 6.5+ in WP Engine User Portal
Can’t Create Site Copy (WP Engine)
Section titled “Can’t Create Site Copy (WP Engine)”Check: WP Engine subscription allows additional environments
Solution: Contact WP Engine support to add environment capacity
DNS Not Propagating
Section titled “DNS Not Propagating”Check: Correct record type (CNAME, not A record)
Solution: Use dnschecker.org to monitor, can take up to 48 hours (usually resolves within minutes)
Checkout Domain Won’t Connect
Section titled “Checkout Domain Won’t Connect”Check: DNS record set to “DNS Only” not “Proxied” (Cloudflare)
Solution: Change proxy status to DNS only, wait for propagation
Migration Fails
Section titled “Migration Fails”Check: BigCommerce store created successfully
Solution: Review error messages in migration tool, contact support with specific errors
Support
Section titled “Support”If you encounter issues:
- Check Commerce Connect → Settings → Status for errors
- Verify DNS propagation at dnschecker.org
- Confirm webhooks registered: Commerce Connect → Settings → Webhooks
- Test in incognito/private browsing (rules out caching)
- Contact WP Engine support with error details
More help: Common Issues
Have questions? Visit our support center →